.

{Guest Post: Garden Hunt}


Today's guest post is by my bloggy friend Abbie of Greening Sam and Avery. You may recognise her from our Friday Outdoor Play linky. If you haven't already visited her blog, be sure to check it out. She writes about raising her two (super adorable!) girls (almost the same age as my two, in fact) to love nature and to be environmentally responsible. She has made it her mission to spend time with them in nature every single day, and her blog is a report on those adventures. In fact, today is a very special bloggiversary for her - 365 days of outdoor play and learning with her kids! Wow, what an achievement, Abbie, well done!


Hello Mama Pea Pod Readers! I am super excited to be guest posting over here today. I co-host the Outdoor Play Link Up with Mama Pea Pod and have gotten some really great ideas from her and her readers. It is a treat to get to “meet” you all! I am sharing an activity that my girls and I love. I wrote about it a while back but both girls like when we pull the rabbits out on any day. Thought this would be a fun one to share because it is great for mamas with kids of any age and can even be a good one in a school setting or at camp! Hope you enjoy it. And be sure to let me know if you try it out.


I originally created this activity (not taking complete credit for this because I am sure years ago I read it or saw it somewhere) for a family program. I thought I could simplify it a bit and use it with Sam. 

Super simple. Cut out some rabbits (or really any other animal that is small and easy to cut out) in a variety of colors. Then hide them in places where rabbits would naturally live. 


Then let the children go to find the rabbits. 


Sam loved "hunting" for the rabbits and I did hide some a bit hard so that she had to keep walking back up and down the path to find all ten that I had hidden.  We talked about which ones were the hardest to find and she called them out by color each time she found one.  We did this activity over and over again (Sam would go play on her swings while I hid them!).


_____________________________________________________________________________

The Nitty Gritty!

I just used a rabbit that I found online, printed it out, cut it out and then traced it onto construction paper.  Since Sam liked this so much I will probably laminate the rabbits just to make them hold up a bit better and be heavier so that I can be sure they won't blow away after I have hidden them.

This is a GREAT activity if you have several kids of different ages.  With rabbits hidden at different levels of difficulty there will be challenges for each kid.  You could also tell each child they are looking only for rabbits of specific colors to guide their hunting.  Although with the little ones they might be so excited to find one they will point it out no matter what color it is.

With older kids the idea of camouflage can be explained in much more detail.  This time of year the hardest rabbit to find is the green one, so why aren't rabbits green?  Would it help them if they were green?  How does being grey/brown/slightly multi-color help rabbits to survive?  There are lots of different examples of animals that use camouflage that can be described and talked about.

This is also a great activity to have packed when you go camping or hiking.  It can be motivation on a trail (just send one parent up ahead while you are on a break to hide the rabbits) or a good at camp activity.


Thanks so much to Abbie for sharing this fun activity to get us playing outdoors! Be sure to check out her blog, Greening Sam and Avery, for more ideas for getting your children outdoors, enjoying nature, and having fun!


Photobucket

{Summer To-Do List}


Anyone who knows me, knows how I love to make lists :-D  For any given project, I usually have so many lists that I have to make a list of my lists, so that I don't forget any ;-p (I'm serious.)

I've got several taped to my kitchen counter right now in fact: Things to Pack for Croatia (that one can come down now); Things to Pack for Canada; Things to Bring Back from Canada; and my latest, Things to Do this Summer.

Ok, so I know that summer has already started, but we've just been too busy enjoying our summer beach vacation :-) (I'll write a separate post for that) to make an official summer bucket list until now. But now that we're back and gearing up for our 'real' summer, I've been making a list of things we'd like to do. (I actually made it today during our 8 hour drive home from the beach.)

I'll probably add to this as we come up with more ideas, but here's what we've got so far:

[Please note that this post contains one or more sponsored links]

Read the original A.A.Milne Winnie the Pooh book to Princess Pea


fizzing paint fizzing

Make fizzing sidewalk paint (hmmm...will need to find a sidewalk for this one)

Do a book-related craft with Princess Pea

Make a craft from one of our Usborne Things To Make and Do books


Make Eric Carle tissue paper prints


Eat lobster and mussels

Go swimming, lots

Run through the sprinkler

Visit the Natural History Museum


Collect shells at the beach

Go to a U-pick farm

Make a cake

Make ice-cream sandwiches (like in Princess Pea's favourite Strawberry Shortcake movie)

Paint our faces with face paints

Have a playdate with Jada Roo

Make a sensory tub (or two) for Sweet Pea

Visit the library

Swimming lessons for Princess Pea

Make fruit/vegetable prints


and one just for Mummy and Daddy:

Go to the movies (haven't done that in years!)


Come Together Kids


Photobucket

Linking to:
ABC & 123's Show and Tell
Come Together Kids' Summer Fun Party

{Guest Post - Sensory Tubs}

I've been wanting to make sensory tubs for my little peas for ages, and for some reason I just never get around to it. However, today's guest post by Rachel of Quirky Momma gives me no more reason to procrastinate! Read on to find out how easy it is to create a sensory tub for your little one, with items you're sure to already have on hand!


Sensory Tubs
Author Rachel
Sensory tub Rice activities

Most preschoolers love touching and feeling things. Tubs (or in our case, a kiddie pool) full of sensory objects are sure to keep your kids engaged and exploring their world!
.

Some of the things you can put into your sensory tub:


.
.Sensory tub Rice activities

.
Do your kids enjoy sensory tubs?  What is their favorite “ingredient”?


Thanks so much to Rachel for sharing this post with us! Read the full, original sensory tub ideas post on her blog, or check out more of her preschool kids activities. And be sure to visit Rachel's blog, Quirky Momma, for more great ideas for your little ones!


Photobucket

{Outdoor Play Blog Hop: Oh Yeah, I Can Do That!}


Join our Outdoor Play blog hop below and link up your own Outdoor Play activities!


Now that Sweet Pea can take a few wobbly steps on her own, she figures she's ready to walk up the slide like the big kids do.


'Oh yeah, I can do that!'


Now for our Outdoor Play blog hop!


Thanks to everyone who participated last week! I won't be featuring any posts this week as I am actually away at the beach, so I can't check out all the wonderful ideas I know you all posted last week. But I will be sure to visit all of them when I return!

So,
How did your kids play outdoors this week?


Here’s just a few guidelines for sharing.

> Any kind of children's outdoor play is welcome. If it happened outside, then please link it up!

> Please do not share any competitions, promotions, or posts that are not related to Outdoor Play.
> Please remember to link back to this post and help us spread the word about the importance (and fun!) of outdoor play!

> Each week we will feature an activity from the previous week. By contributing you are giving permission for an image and link to your post to be republished. 

Thanks for sharing.


Share this link-up on your site

Photobucket

{Guest Post - Yarn Art}

This is a guest post by Amy of Kids in the Studio. I only recently discovered her blog and it contains some wonderfully creative art ideas for kids, little and big. Today she's sharing a post about doing yarn art with toddlers. I'll let Amy introduce herself...


Hi, I'm Amy! I live in coastal New England with my three kids, ages 2, 7, and 9. I blog about our artistic adventures at kids in the studio and my own crafty pursuits at Salamander Dreams, but now that it’s finally summer, I'm looking forward to spending time digging holes and making sandcastles with my kids at the beach.

Yarn Art

I’m really happy to be guest posting here while Mama Pea Pod spends some time with family! I’m sharing an activity my two-year-old, G, and I did several months ago. I’m passionate about providing my kids with opportunities for open-ended creative exploration, so I’m always on the lookout for new ideas to try.
Sometimes those ideas are hidden inside a more typical craft project; that was the case here. Family Fun’s February issue included instructions for a yarn heart.  I thought, how fun would it be to run your hands along that sticky paste and put those yarn scraps any place you wanted, instead of being confined to a cookie cutter shape? So that’s what G and I did.
Materials: Yarn scraps; cornstarch glue; and some type of strong paper, cardstock, or cardboard (we used vellum paper). To make cornstarch glue according to the Family Fun recipe, stir ¼ cup cornstarch and ½ cup water in a small pan until it’s smooth. Heat over medium heat until it's thick and clear-ish. Let it cool so it doesn’t burn little fingers.


As a knitter, I have no shortage of yarn scraps. Whenever I weave in and cut those pesky ends, I save them. I can’t help it. They might come in useful some day. So I have overflowing bags of yarn ends, in any color you can think of. I cut some down, but I left the bag on the table, and G let me know if she needed a color that wasn’t already in the pile.
I demonstrated first to cut down on frustration: Put the yarn in the glue, run your fingers down the yarn to wipe off extra glue, and put it on the paper. As she worked, she repeated these instructions out loud to herself. She told me what color she wanted, and she let me know if the piece was too long and if so, where I should cut it for her.


Look at those wonderfully messy hands! They belong to a girl who is in charge of her creation!
Towards the end, G indicated she needed a particular small ball of yarn. At first I thought she was asking for the dark grey portion, which was in the middle of the bundle (it was a scrap ball from a self-patterning yarn). But no, she wanted the balls themselves, and she glued them on. Here’s her finished piece.


I never would have thought of gluing on whole balls, and I wasn’t sure they would stay, but who am I to place limits on ideas? They stayed put just fine, and she took her yarn art into another dimension!
This activity can be approached in various ways. I like the abstract image my toddler created, but older kids might want to try making a more representational picture or specific designs with the yarn. You can experiment with different textures (a fuzzy wool, a smooth mercerized cotton, a thin string or rough twine). Once the glue has dried, try making crayon rubbings of the yarn art or, if your child doesn’t mind painting their yarn art, some prints. Have fun!


(This post originally appeared at kids in the studio in a slightly different form.)


Thanks so much to Amy for sharing this with us! Be sure to check out her blogs, Kids in the Studio and Salamander Dreams for more arts and crafts inspiration for kids and mommies!

Photobucket

{Chalk Painting}


Recently there have been lots of posts floating around the blogosphere about chalk painting (haven't seen them? Look here, here, here, and for an extra fun version check here). Every time I see one of these posts, I think, "oh yeah, I really want to try that!", but then I never get around to it.


But no worries - in the meantime, Sweet Pea discovered how to do chalk painting all by herself anyway!

It started with some chalk drawing at the easel.


Combined with some water & brush painting.


And pretty soon the chalk was dipped into the water pot.


And suddenly, this wet chalk made much brighter, more vibrant marks on the chalkboard!


So into the water went some more chalk.
And this time she let it soak for a minute, while she watched the air bubbles rise up to the surface.


And some more.


And then it was fished out, and the chalk drawing continued...


on the floor (but no problem - since it's just chalk, it wipes up with a dry cloth/tissue!)


 Now she loves dipping and soaking her chalk sticks in the water
and trying out new methods of chalk painting (note the two-chalk-sticks-in-one-hand method)!


She's an artistic genius, I tell ya'! ;-p


{Guest Post - Sand Art}

Maggy of the fantastic Red Ted Art is kindly guest posting today. She's sharing this toddler-friendly sand art idea with us - a perfect kids' craft for summertime!


The UK has been blessed with some beautiful weather, so like many, we headed down to our favourite beach on the South Coast! It is always a wonderful visit, as we go with friends that we don’t see so often. And it is wonderful to see the children play and have fun together… of course it is also an opportunity to collect stones and shells! And this time we also took some sand home!

The Craft

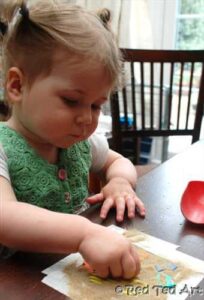
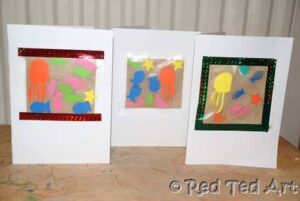
I have seen many wonderful blogs using contact paper with the little ones – it is such a great craft for the under 2s as there is no “getting messy with glue” or “sticky shapes sticking to your fingers”. It is also fabulous for SAND!

So.. we have several “thank you cards” that we “owe”, so we decided to make some cards.


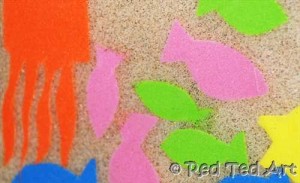
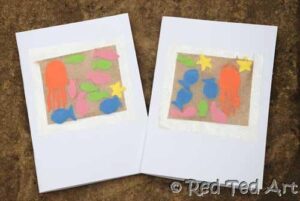
Materials: Foam for fish (but you can use coloured card or anything lying around), contact paper, sand, card, masking tape

Time: the craft itself is quick, but the “set time” (cutting fish, contact paper), takes longer. Give yourself a leisurely 45min – an hour

1) Cut out some “under the sea” creatures, we did lots of fish, some jelly fish and some starfish. Older children who can “assemble” a picture better, could add some seaweed and rocks and shells

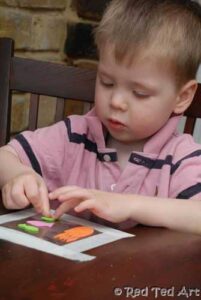
2) Stick some contact paper, sticky side up, on the table with masking tape – the masking tape also makes for a “nice clean board”.


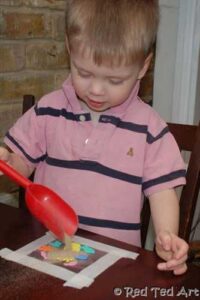
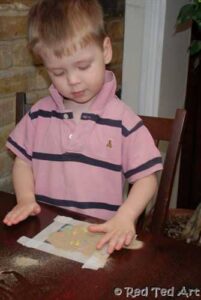
3) Stick your shapes (nice and hard) and then add your sand and spread it nicely


4) Remove all masking tape and stick on your final card. Add a board if you like (Red Ted insisted!)


Find more kids' craft ideas at Red Ted Art! There you can also find the original version of this sand art post.

Thanks so much for sharing this with us, Maggy! We will definitely be hitting the beach this summer!


Photobucket