{Easiest Sewing Project Ever: No Cut No Measure Table Runner Tutorial for Complete Beginners}

EASIEST SEWING PROJECT EVER:

TABLE RUNNER

Pin it! Easiest sewing project ever - a no cut, no sew table runner!
Oh my, I cannot believe how much I love this table runner and how incredibly easy it was to make! Seriously, there is absolutely nothing to it whatsoever! No cutting! No measuring! That's my kind of sewing project! 
:-)

I found these beautiful 'fat quarters' at our local hobby shop. All I did was select 3 coordinating fabrics and sew them together! (You can buy pre-matched coordinating fat quarter sets here [affiliate link].)

I am truly a complete beginner when it comes to sewing (or most anything domestic, really), so I get it - you still want a tutorial. So, here is exactly what I did:

Iron your fabrics nice and flat. Lay out your 3 fat quarters in a line, arranged in the order you like and be sure the patterns are all right-way up.


Lay out your table runner fabrics as you want them to look when finished


Take the left hand piece and fold it over the middle piece, so that the two pieces are facing right-side-in together. Sew along one edge (the edge where you want them to join, obviously, so select the edge that suits how you want them laid out in the end - if you folded over like I just said, that should be the left side), about 3/8 to 1/2 inch in from the edge of the fabric. Open out flat. Lay it back down with the third piece again. Take the third piece and fold it over the middle piece, so that the right sides are facing in together. Sew along the edge where you want them to join (this time it will be the right side if you folded as I said). Open out flat. Iron again so that the seams lie flat.


Sew your table runner fabrics together - so easy!


Fold the edges in as straight as you can (I just eyeballed it) and pin all the way around the entire runner. Sew a hem all the way around, about 1/4 to 3/8 inch in. Iron again so the seams lie flat.

That's it! Yay, you! You sewed something!


Photobucket

{DIY Galaxy Shirts}

DIY 'Galaxy' Shirts

Pin it! Kid-Made DIY Galaxy Shirts!


Kids and adults alike will enjoy showing off their DIY 'Galaxy' shirts - fun and simple wearable art for the whole family!

You will need: [all product links are affiliate links for your convenience]


Lay your shirts on a large garbage bag or tarp outside. Place a piece of cardboard or plastic inside the shirt, to prevent bleach and paint from seeping through to the back.

Scrunch the centre of the shirt and twist it tightly (if you want, you can secure it with an elastic, but it's not necessary).

Put some bleach in the spray bottle and spray it onto the front of the shirt. Then untwist and lay out to dry.


Spray painting fabric for galaxy shirts


Once dry, use the spray-on fabric paints to spray over the front of the shirt (keep the cardboard/plastic inside). We found that it's best to apply the spray paint liberally - we thought Sweet Pea, aged 4, was putting far too much on hers as it seemed too concentrated, but in the end hers turned out to be the brightest and prettiest!

Leave out to dry according to the directions on your fabric paint.

Then wear them in style and show off your coolness! (Thanks, Auntie K, for doing these with us!)

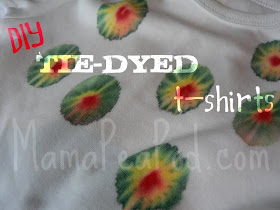
Still want to make more? Try these Sharpie Tie-Dye Shirts next! 


Photobucket


Don't miss a thing! 

{DIY Bubble Machine}

DIY BUBBLE MACHINE

Pin It! DIY Bubble Machine


These DIY bubble machines are easy and fun to make for endless foamy bubble fun this summer!

You will need: [affiliate links included for your convenience]

  • *styrofoam or plastic cups
  • *plastic food wrap
  • *bendy straws 
  • *tape in a pinch but preferably sticky tack or chewed gum ;-p
  • *dish soap or bubble solution
  • *toothpick
  • *elastic bands or hair elastics
  • *something sharp to poke holes in the cups (we used a corkscrew)


Materials needed to make a DIY bubble machine for kids


1. Poke a hole in the cups, about 1 - 2 cm above the base, that is just big enough for a straw. Be careful not to let the hole tear too big. (I think next time we'll try a hole punch - if you try that, let me know how it works!)

2. Poke the bent end of the straw through the hole so that the long end is on the outside of the cup, bent upwards. Use tape, sticky tack or even a piece of chewed gum to seal around the hole. (We used tape, but it did leak, so if you have sticky tack or gum I'd go with those.)


How to attach the straw for your DIY bubble machine for kids


3. Pour bubble mixture or water with a generous squirt of dish soap into the cup (if your cup is leaky, you might want to do this step after step 5 so as to avoid losing all your solution.)

4. Pull a piece of the plastic food wrap as tightly as you can over the top of the cup and secure with an elastic band or hair elastic.


Poking holes in the plastic wrap for your DIY bubble machine for kids


5. Use a toothpick to poke lots of tiny holes in the plastic wrap. (If you didn't yet put your bubble solution in, follow this step by taking off the wrap and adding it now, then reattaching the wrap, pulling tightly again.)

6. Blow into your straw and watch the bubbles foam out of your own homemade bubble machine! Fun!!


Blowing lots of bubbles at once with your homemade bubble machine!


*Note: Obviously, this is only suitable for children who are not going to suck on the straw - please use your parental judgement as to whether this activity is appropriate for your child. (I did it with my 7 year old and 4 year old with no doubts in my mind.)


Photobucket